Description
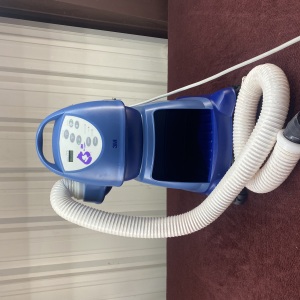
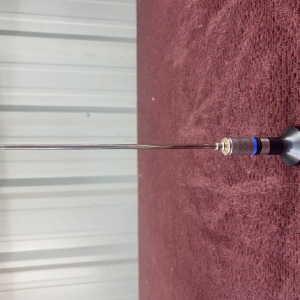
SPIDER2 Limb Positioner
Device Description
The SPIDER2 combines strength and flexibility to provide optimal intraoperative positioning.
The SPIDER2 has been designed to attach to the rail on all standard operating room tables, as
well as the rail on the back of the T-MAX Beach Chair Positioner.
Intended Use
The Smith & Nephew Limb Positioner is intended for use during surgical procedures to attach
to the rail of standard operating room tables, or T-MAX Beach Chair Positioner to maintain
patient limb position during surgical procedures.
Indications for Use
The SPIDER2 is used to position limbs during surgical procedures.
Contraindications
None
Warnings
• Failure to do the following may result in injury to the patient and/or health care professional.
• It is the responsibility of health care professionals to be familiar with appropriate surgical techniques. Prior to using SPIDER2 the Instructions for Use must be read and understood, paying special attention to warning information. Failure to take adequate care may result in injury to the patient and/or health care professional.
• Read and understand the particulars of the Instructions for Use for the specific accessory being used. Do not use the system without having read and understood all relevant Instructions for Use.
• Surgery specific Instructions for Use contain further warnings; refer to appropriate Instructions for Use prior to use of the product.
• The SPIDER2 system has been tested and found to comply with the emission and immunity limits for medical devices to the IEC 60601-1-2 and Medical Device Directive 93/42/EEC. Compliance to the limits is intended to provide reasonable protection against harmful interference in a hospital environment. There is no guarantee that interference will not occur in an installation. If the SPIDER2 does cause harmful interference to other devices, it is recommended that the user attempt to correct the interference by one or more of the following actions:
-
Reorient or relocate this equipment, the other equipment, or both.
-
Increase the separation between the pieces of equipment.
-
Consult a biomedical engineer.
• Prior to each use equipment and components are to be inspected for damage.
• Prior to each use inspect plastic enclosure for any damage that could result in fluid entry.
• Do not use any damaged components. Damaged equipment or components may result in injury to the patient and/or health care professional.
• Load on SPIDER2 is not to exceed 50 lbs (23kg). Failure to comply may result in patient and/or health care staff injury. Specific SPIDER2 orientations can accommodate higher loads; contact Smith & Nephew.
• Joints of SPIDER2 cannot be locked or unlocked without a battery in place.
• The SPIDER2 Setup Button is disabled when the switch drape and/or foot pedal are plugged in.
• If Switch Drape Button is connected to the limb, do not disconnect patient’s limb from SPIDER2.
• Always hold the SPIDER2 and/or patient’s limb while positioning the SPIDER2.
• No modifications to this equipment are allowed.
• If changing batteries during a surgical procedure, do not change the state of the Power Switch. Doing so during surgery may cause the SPIDER2 to release pressure causing unwanted movement.
• Do not change the state of power switch if the patient is connected to the SPIDER2.
• Do not grasp the SPIDER2 over the quick connect release buttons as this can disengage the quick connect locks and disconnect the patient’s limb from the SPIDER2.
• Do not release the SPIDER2 and/or patient’s limb until you are certain the SPIDER2 has locked.
• Ensure all cables are routed to avoid damage. Damaged cables must be replaced. Failure to replace cables may result in injury to patient and/or health care staff.
• Single use stabilization kits are not to be reused or used if packaging has been damaged. Failure to comply may result in patient injury and/or infection.
• If SPIDER2 motor runs continuously, or runs more than once per minute while in locked state, disconnect patient and have product serviced.
• Do not allow fluids to enter the switch drape connection receptacle or the foot pedal connection receptacle.
• Use Foot Pedal with Smith & Nephew products only.
• Do not use in AP = Anaesthesia proofed and G = Gas (AP, APG, IEC 60601-1), and OEA = oxygen-enriched atmosphere environments.
• Do not use solvents, lubricants, or other chemicals unless otherwise specified.
• Use SPIDER2 battery charger with SPIDER2 battery pack REF 72203301. Other types of batteries may burst, causing personal injury and damage to charger.
• The SPIDER2 battery charger is not permitted to be used in patient care areas due to leakage current. Failure to comply could result in injury to the patient and/or health care professional.
• The SPIDER2 battery charger is not suitable for the use in the presence of a flammable anesthetic mixture with air or with oxygen or nitrous oxide.
• The SPIDER2 battery charger is for indoor use only.
• Replace defective SPIDER2 battery charger cords and wires immediately.
• The socket-outlet shall be installed near the SPIDER2 battery charger and shall be easily accessible.
• Use of accessories or cables with this equipment, other than those specified or provided by the Smith & Nephew, could result in increased electromagnetic emissions or decreased electromagnetic immunity and result in improper operation.
• Electrical Interference. This equipment is designed to be used as a stand-alone, in proximity too, and with other medical equipment. This equipment and the other equipment should be observed to verify that they are operating normally.
• Abnormal performance, due to Electromagnetic Disturbances, may be manifested by a failure to properly maintain positioning of the limb.
• High Frequency (HF) Interference: This equipment was designed and tested to be used with HF Electrical Surgical Unit (ESU) equipment.
• Essential Performance. Hydraulic pressure cannot drop unexpectedly without adequate notice so that practitioner has time to switch to a more traditional means of maintaining damaged joints or bone fractures separated during the surgical procedure.
Precautions
U.S. Federal law restricts this device to sale by or on the order of a physician.
•Do not store SPIDER2 in locked position as this will drastically reduce the life expectancy of device. Depressurize before storing by turning Power Switch to the DEPRESSURIZE Position for 1 second and then allowing the Switch to return to the OFF Position.
Prior to First Use
1. Charge SPIDER2 battery prior to first use, batteries provided are not fully charged. Refer to Charging Battery section in this document.
2. Once the battery is fully charged, attach the battery to SPIDER2.
3. Turn Power Switch to ON Position (Figure 4); SPIDER2 will be activated and all joints will lock.
Unlock Power Switch
Once locked, the joints can be released in one of two ways:
1. Turn the Power Switch to the depressurize position
2. Press the Set Up Button.
Note: The SPIDER2 Set Up Button is disabled when the Switch Drape and/or Foot Pedal are plugged in.
Instructions for Use
SPIDER2™ Attachment to O.R. Table Rail
1. If SPIDER2 has been turned on and joints are locked, holding the Set Up Button allows temporary repositioning of the SPIDER2. When Set Up Button is released, all joints will lock again.
2. Open SPIDER2 Clamp by turning Clamp Actuating Knob counterclockwise so clamp opening is larger than table rail.
3. Place Clamp over rail at an angle, placing the top jaw of the Clamp on the rail first then lower bottom jaw into place.
4. Tighten onto table rail by turning Clamp Actuating Knob clockwise
5. Verify Clamp is rigidly attached; if not, additional tightening of the Clamp Actuating Knob may be required.
Setting up SPIDER2 for Surgery
1. Turn SPIDER2 Power Switch to the ON position.
2. Adjust angle of Dumbbell Joint (relative to table rail) by turning Clamp Indexing Handle counter clockwise. This separates the Clamp and allows repositioning of SPIDER2 to vertical, horizontal, or a 45° angle. Turn Clamp Indexing Handle clockwise to tighten clamp.
3. The SPIDER2 Clamp Indexing Handle position can be re-oriented by pulling up on the Clamp Indexing Handle and turning clockwise or counter-clockwise. Once the ideal position is found, release to lock into position.
4. Press Set Up Button to adjust SPIDER2 to approximate setup position and check range of motion prior to draping.
Note: The Set Up Button must be pressed the entire time to allow the SPIDER2 to move.
5. Insert sterile Piggy Back into SPIDER2 Distal end.
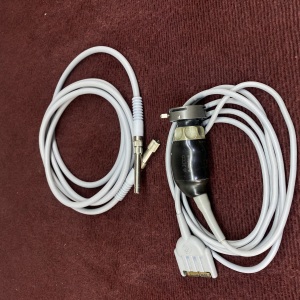
6. Drape SPIDER2 with Switch Drape (or standard Drape if only Foot Pedal is to be used).
7. Connect Foot Pedal, Switch Drape, or both, to appropriate Connection Receptacle.
8. Slide Drape under Drape Clips and ensure that the Drape completely covers the receptacles to shield them from fluids.
WARNING: Do not allow fluids to enter the Switch Drape Connection Receptacle or the Foot Pedal Connection Receptacle
9. Patient’s limb is attached to SPIDER2 by various accessories. Each accessory has a male post that connects into the female receptor on the Distal end of the SPIDER2. After inserting accessories, lock Quick Connect to avoid accidental disconnection.
10. Position Switch Drape Release Button (if used) in a convenient location for easy access throughout the procedure.
11. Refer to the desired accessory’s Instructions for Use for set up and positioning instructions.
Positioning using the SPIDER2 During Surgery
1. Ensure Power Switch is in ON position; indicator light should be lit and a solid green color. If blinking, or OFF, replace battery.
2. Grasp the patient’s limb (attached to SPIDER2) and/or SPIDER2 slender arm.
3. Press with your finger on the Switch Drape Release Button or step on Foot Pedal; this immediately releases all three SPIDER2 joints.
4. Move the patient’s limb to the desired position.
5. Take your finger off the Switch Drape Release Button or foot off Foot Pedal to immediately lock all three SPIDER2 joints.
To Remove SPIDER2 from O.R. Table Rail
1. Turn the Clamp Actuation Knob counterclockwise to release jaw from table rail.
2. Tilt SPIDER2 over the rail and lift.
3. If Clamp does not release rail after Clamp Actuating Handle has been turned counterclockwise, tap the top of the Clamp Actuating Handle; Clamp should then release the rail.
To Depressurize SPIDER2 for Storage
1. DEPRESSURIZE before storing; by disconnecting the Foot Pedal and/or Switch Drape, and then pressing the Power Switch to the DEPRESSURIZE Position for 1 second.
2. The Power Switch will then return to the OFF/STORAGE Position.
CAUTION: Do not store SPIDER2 in locked position as this will drastically reduce the life expectancy of device. Depressurize before storing by turning Power Switch to the DEPRESSURIZE Position for 1 second and then allowing the Switch to return to the OFF Position.
To Clean SPIDER2™
1. Remove all single use components and accessories. Discard single use components.
2. Clean and process each accessory.
Note: Refer to cleaning and sterilization instructions for accessories: 79-99-04 Cleaning
and Sterilization Instructions.
3. Wipe entire SPIDER2 with mild detergent / disinfectant, taking care to avoid fluid entry into Switch Drape or Foot Pedal Receptacles.
4. Wipe battery with mild detergent / disinfectant.
Note: Avoid the use of excessive amounts of liquid during cleaning.
5. Dry SPIDER2 with a cloth or allow to air dry.
6. DO NOT immerse any portion of SPIDER2 in liquid.
Note: If moisture enters the equipment it can cause corrosion, and damage electrical
and/or mechanical components.
7. DO NOT autoclave SPIDER2.
8. DO NOT use ethylene oxide to sterilize SPIDER2.
Storage
1. Turn OFF and DEPRESSURIZE the SPIDER2 by disconnecting the Foot Pedal and/or
Switch Drape and pressing the Power Switch to the DEPRESSURIZE Position for 1 second
CAUTION: Do not store SPIDER2 in locked position as this will drastically reduce the
life expectancy of device. Depressurize before storing by turning Power Switch to the
DEPRESSURIZE Position for 1 second and then allowing the Switch to return to the OFF Position.
2. Store the SPIDER2 on the SPIDER2 Cart by hanging the Hinge Joint over the support hook.
Maintenance
Only trained individuals should perform maintenance on SPIDER2. Contact Smith & Nephew to determine which maintenance can be performed on site.